La Chrom HPLC D-7000: Unterschied zwischen den Versionen
Cbier (Diskussion | Beiträge) Keine Bearbeitungszusammenfassung |
Cbier (Diskussion | Beiträge) Keine Bearbeitungszusammenfassung |
||
| (24 dazwischenliegende Versionen desselben Benutzers werden nicht angezeigt) | |||
| Zeile 125: | Zeile 125: | ||
|style="text-align:left; vertical-align:top;"| [[File:L5.png|top|center|thumb|500px|Start]][[File:L6.png|top|center|thumb|500px|Initializing]][[File:L7.png|top|center|thumb|500px|Initializing]][[File:L8.png|top|center|thumb|500px|Connected]] | |style="text-align:left; vertical-align:top;"| [[File:L5.png|top|center|thumb|500px|Start]][[File:L6.png|top|center|thumb|500px|Initializing]][[File:L7.png|top|center|thumb|500px|Initializing]][[File:L8.png|top|center|thumb|500px|Connected]] | ||
|- | |- | ||
|valign=top| After the HPLC is connected to the computer you have to purge the system. To purge it manually is the easiest way to do it. | |valign=top| After the HPLC is connected to the computer you have to purge the system. To purge it manually, is the easiest way to do it. | ||
*Manually set the pump (Manual set [[File:Manual set.png|30px]]; 2 [[File:Zahl 2.png |30px]]; 5 [[File:Zahl 5.png |30px]]; Enter [[File:Enter.png|30px]]; 2 [[File:Zahl 2.png |30px]]; 5 [[File:Zahl 5.png |30px]]; Enter [[File:Enter.png|30px]]; 2 [[File:Zahl 2.png |30px]]; 5 [[File:Zahl 5.png |30px]]; Enter [[File:Enter.png|30px]]; Enter [[File:Enter.png|30px]]; Enter [[File:Enter.png|30px]]; Enter [[File:Enter.png|30px]]) | *Manually set the pump (Manual set [[File:Manual set.png|30px]]; 2 [[File:Zahl 2.png |30px]]; 5 [[File:Zahl 5.png |30px]]; Enter [[File:Enter.png|30px]]; 2 [[File:Zahl 2.png |30px]]; 5 [[File:Zahl 5.png |30px]]; Enter [[File:Enter.png|30px]]; 2 [[File:Zahl 2.png |30px]]; 5 [[File:Zahl 5.png |30px]]; Enter [[File:Enter.png|30px]]; Enter [[File:Enter.png|30px]]; Enter [[File:Enter.png|30px]]; Enter [[File:Enter.png|30px]]) | ||
| Zeile 217: | Zeile 217: | ||
== Measuring == | == Measuring == | ||
After purging the system and creating a method the column you want to use should be chosen and flushed for about ~30 min with the desired solvent mixture. Columns don´t like harsh polarity changes, | After purging the system and creating a method, the column you want to use should be chosen and flushed for about ~30 min with the desired solvent mixture. Columns don´t like harsh polarity changes, therefore a slow change of the solvent polarity to the desired solvent mixture is preferred. After conditioning the column, the prepared sample has to be put into the sample table of the autosampler. Then the position and the related method are listed in the sequence table. | ||
===Creating a sequence table=== | ===Creating a sequence table=== | ||
| Zeile 263: | Zeile 263: | ||
|- style="vertical-align:top;" | |- style="vertical-align:top;" | ||
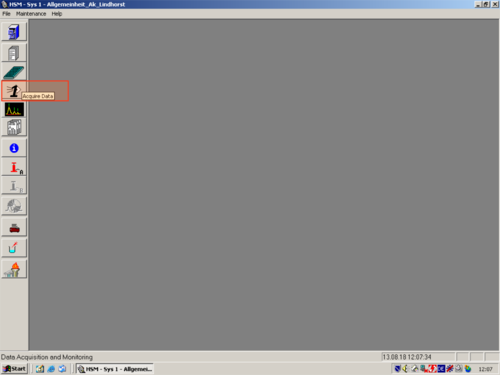
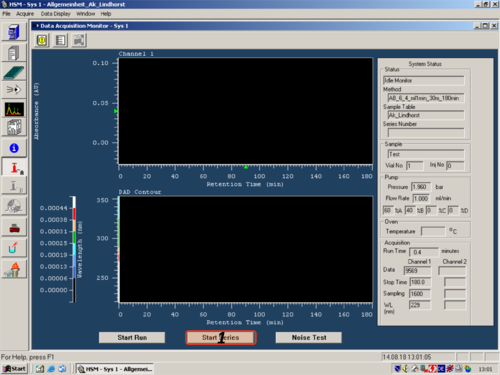
|style="width:400px;text-align:; vertical-align:top;"| | |style="width:400px;text-align:; vertical-align:top;"|Start the measurment '''(1)'''.Be patient the system is not so fast !!!!!!!!!! | ||
|style="width:525px;text-align:left; vertical-align:top;"| [[File: | |style="width:525px;text-align:left; vertical-align:top;"| [[File:s19.png|top|center|thumb|500px|Start Measurment]] | ||
|- | |||
|} | |} | ||
=== | ===Flushing=== | ||
After the last measurement the column has to be flushed and stored at a certain solvent mixture. The column is normally flushed with a solvent mixture, which has a higher organic content then the solvent used during the measurement. | |||
{| class="wikitable" | {| class="wikitable" | ||
! | ! Explanation !! Picture | ||
|- style="vertical-align:top;" | |- style="vertical-align:top;" | ||
|style="width:400px;text-align:; vertical-align:top;"| | |style="width:400px;text-align:; vertical-align:top;"|The easiest way to flush the column is manually. | ||
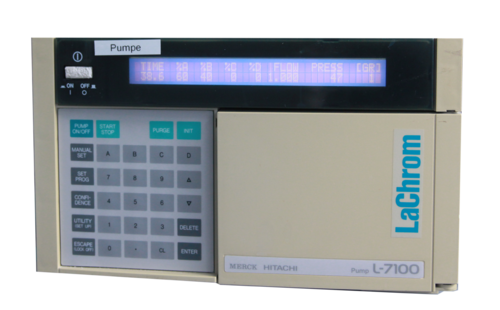
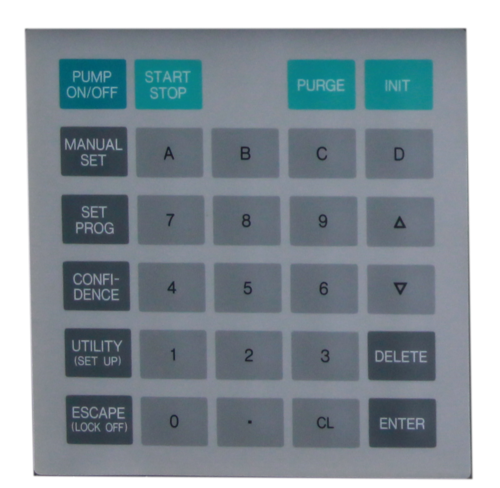
*Manually set the pump (Manual set [[File:Manual set.png|30px]]; 0 [[File:Zahl 0.png |30px]]; 5 [[File:Zahl 5.png |30px]]; Enter [[File:Enter.png|30px]]; 4 [[File:Zahl4.png |30px]]; 5 [[File:Zahl 5.png |30px]]; Enter [[File:Enter.png|30px]]; 0 [[File:Zahl 0.png |30px]]; 5 [[File:Zahl 5.png |30px]]; Enter [[File:Enter.png|30px]]; Enter [[File:Enter.png|30px]]; Enter [[File:Enter.png|30px]]; Enter [[File:Enter.png|30px]]) | |||
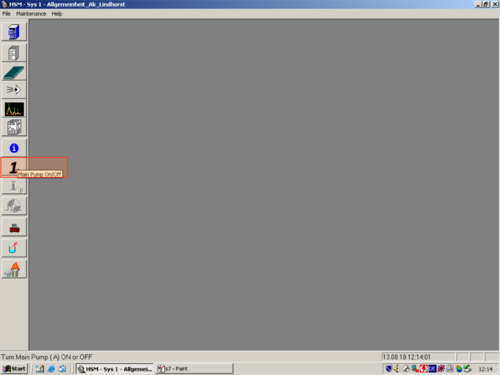
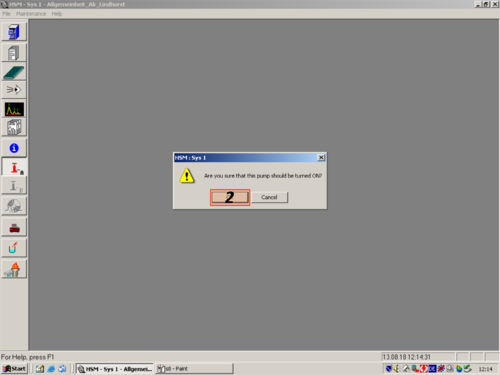
*Turn on the Pump (Pump ON/OFF [[File:ON OFF.png|30px]]); | |||
[[File:spüleinstellung.png|top|center|thumb|400px|''Flushing'']] | |||
Let it run for about 30 min. | |||
*Turn the pump off(Pump ON/OFF [[File:ON OFF.png|30px]]). | |||
|style="width:525px;text-align:left; vertical-align:top;"| [[File: | *Change the pump manually to the storange solvent mixture (this depend on the column); | ||
*Turn the pump back on (Pump ON/OFF [[File:ON OFF.png|30px]]) | |||
Let the system run for additional 10 min | |||
*Switch of the pump (Pump ON/OFF [[File:ON OFF.png|30px]]). | |||
|style="width:525px;text-align:left; vertical-align:top;"| [[File:Pumpe L 7100.png|top|center|thumb|500px|Pumpe]] [[File:Tastatur.png|top|center|thumb|500px|key panel]] | |||
|} | |} | ||
=== | ===Shut Down=== | ||
{| class="wikitable" | {| class="wikitable" | ||
! | ! Explanation !! Picture | ||
|- style="vertical-align:top;" | |- style="vertical-align:top;" | ||
|style="width:400px;text-align:; vertical-align:top;"| | |style="width:400px;text-align:; vertical-align:top;"|Turn the pump off. | ||
|style="width:525px;text-align:left; vertical-align:top;"|[[File: | |style="width:525px;text-align:left; vertical-align:top;"|[[File:Shut5.png|top|center|thumb|500px|Pumpmenu]][[File:Shut4.png|top|center|thumb|500px|Press OK]] | ||
|- style="vertical-align:top;" | |- style="vertical-align:top;" | ||
|style="width:400px;text-align:; vertical-align:top;"| | |style="width:400px;text-align:; vertical-align:top;"| Dissconect HPLC. | ||
|style="width:525px;text-align:left; vertical-align:top;"|[[File: | |style="width:525px;text-align:left; vertical-align:top;"|[[File:Shut1.png|top|center|thumb|500px|]] [[File:Shut2.png|top|center|thumb|500px|]] [[File:Shut3.png|top|center|thumb|500px|]] | ||
|- style="vertical-align:top;" | |||
|style="width:400px;text-align:; vertical-align:top;"| Switch off the HPLC. | |||
|style="width:525px;text-align:left; vertical-align:top;"|[[File:L HPLC Nummeriert.png|top|center|thumb|500px|]] | |||
|} | |} | ||
Aktuelle Version vom 7. September 2018, 10:31 Uhr
!!!Use the operator book!!! DO NOT FORGET!!!!
Everybody who is using the HPLC should enter his name, the uesed colum, the solvent mixture and the back pressure of the system in the user book.
Assembly
A HPLC consists of different parts. The La Chrom HPLC D-7000 in room 118 is made up of the folowing modules
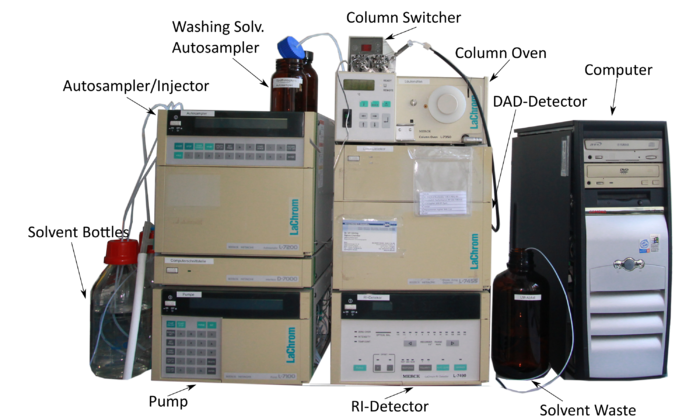 | |||||
|---|---|---|---|---|---|
| Module | Product Number | Picture | Manual | ||
| Solvent bottles | 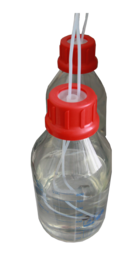 |
||||
| Pump | L7100 |  |
Quaternary Pump | ||
| Autosampler/ Injector | L-7200 | 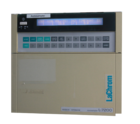 |
Autosampler | ||
| Interface | D-7000 | Interface | |||
| DAD-Detector | L-7455 | 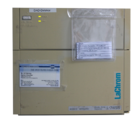 |
DAD-Detector | ||
| RI-Detector | L-7490 |  |
RI-Detector | ||
| Column Switcher | BESTA-High-Pressure-Motorvalve | 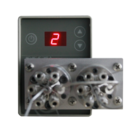 |
Column Switcher | ||
| Column Oven | L-7350 |  |
Column Oven | ||
| Solvent Waste |  |
||||
| Computer (Windows 2000) |  |
||||
Preparations
Column
The HPLC is connected to a column switcher, which gives you the opportunity to choose between five different columns. If the column you want to use isn´t included you have to change one of the columns. The method you want to use should be compatible with the conditions the column can stand (pH, pressure, solvent etc.). After the installation you should take care, that all connections are tight. All columns can be tempered in the column oven.
Solvent
* Before starting a measurement, the solvent level should be checked and if necessary refilled. Don´t forget to check the Autosampler solvent bottle. *All used solvents have to be degassed and be compatible with the used column. Especially the RI-Detector won´t work with not proper degassed solvents. * It is required, that all solvents have HPLC quality and are particle free. Small particles can permanently block the capillaries and valves. Avoid the use of the following steel-corrosive solvents: #Solutions of alkali halides and their respective acids (for example, lithium iodide, potassium chloride, and so on). #High concentrations of inorganic acids like sulfuric acid, especially at higher temperatures (replace, if your chromatography method allows, by phosphoric acid or phosphate buffer which are less corrosive against stainless steel). #Chromatographic grade ethers, which can contain peroxides (for example, THF, dioxane, diisopropylether) such ethers should be filtered through dry aluminium oxide which adsorbs the peroxides. #Halogenated solvents or mixtures, which form radicals and/or acids, for example: ::2CHCl3 + O2 → 2COCl2 + 2HCl ::This reaction, in which stainless steel probably acts as a catalyst, occurs quickly with dried chloroform if the drying process removes the stabilizing alcohol. Prevent Blocking of Solvent Filters Contaminated solvents or algae growth in the solvent bottle will reduce the lifetime of the solvent filter and will influence the performance of the pump. This is especially true for aqueous solvents or phosphate buffers (pH 4 to 7). The following suggestions will prolong lifetime of the solvent filter and will maintain the performance of the pump: * Use sterile, if possible amber, solvent bottles to slow down algae growth. * Filter solvents through filters or membranes that remove algae. * Exchange solvents every two days or refilter. * If the application permits add 0.0001–0.001 M sodium azide or 0.1 % TFA to the solvent. * Avoid exposure of the solvent bottles to direct sunlight. * When using buffer solutions, flush the system with water before switching it off. NOTE Never use the system without solvent filter installed.
Waste
Before the use of the HPLC, the waste container should be checked and emptied if necessary.
Sample
The sample preparation is an important part of the HPLC analysis. It is important, that the sample is dissolved and filtered before the measurement. This prevents the contamination of the column and the precipitation of the sample on the column bed. The sample has to be dissolved at any time and shouldn´t precipitated from the eluent. Therefor it is not thoughtful to dissolve the sample in pure methanol or acetonitrile, if you are working with an RP-phase column. The risk of sample precipitation during the measurement is to high. Sample precipitation causes a rising of the back pressure and clogging of the column, which leads to an irreversible poor resolution.
What is the right solvent mixture to dissolve many sample?
This question can´t be answered easily and depends on the sample. The most important thing is, that the sample is in solution during the whole measurement. How can you find the right solvent mixture? One way is to do this in practice is the following: At first take 1 mg of your sample and dissolve it in 500 µL HPLC Methanol respectively ACN. Is the solution still clear you can successively add water in 100 µL steps. After each addition check if the solution is still clear. If the solution is clear go on with addition until you reach a total volume of 1000 µL. If it becomes cloudy stop the addition of water and add 100 µL of HPLC Methanol respectively ACN. The precipitated sample should dissolve again. Then calculate the solvent ratio. This is the maximum solvent ratio you can use for the eluent without the risk of precipitation of the sample on the column bed. Solvent mixtures with higher amount of water would lead to precipitation. To get rid of remaining particles, the sample solution is filtered with a syringe filter.
Start
Bevor you start the HPLC it is important to make preparations (see previous paragraph).
| Explanation | Picture |
|---|---|
| If you want to start the HPLC you have to switch on the different parts of the HPLC-assembly. # Pump # Interface/ Interface # Autosampler/ Injector # RI-Detector # DAD-Detector # Column Oven # Column Switcher # Computer (if it is not already running) | 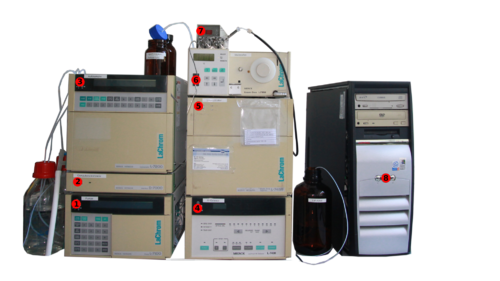 |
| Open the programm "D 7000- HSM" by double clicking the shortcut with the left mouse button. | 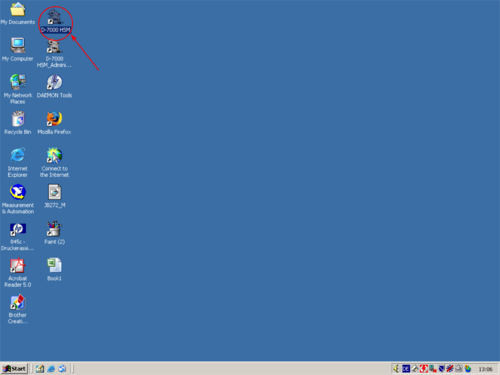 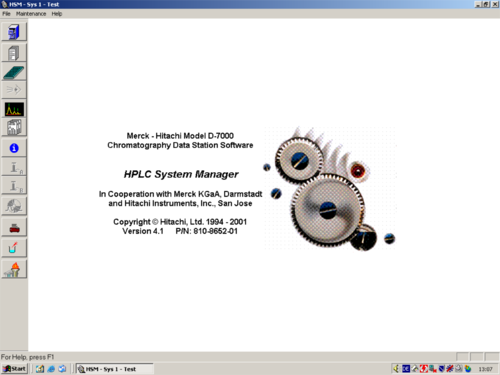  |
| After the programm has opened click the white " i " (1) on blue ground. A window opens and shows you the hardware status. For connecting the computer with the HPLC click on " Initialize" (2). The status changes to "Downloading" (3). After a while the HPLC and computer are connected and the status changes to "Idle" (3a). All connected parts are shown on the left (4). The connection then can be confirmed with "OK" (5). | 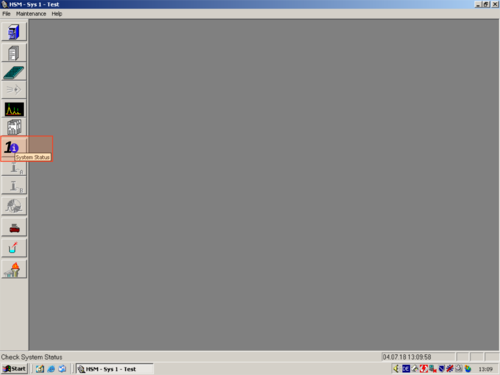 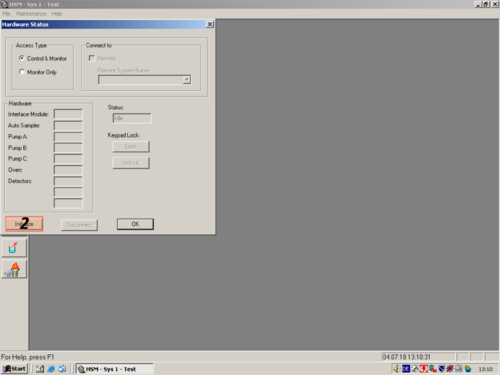 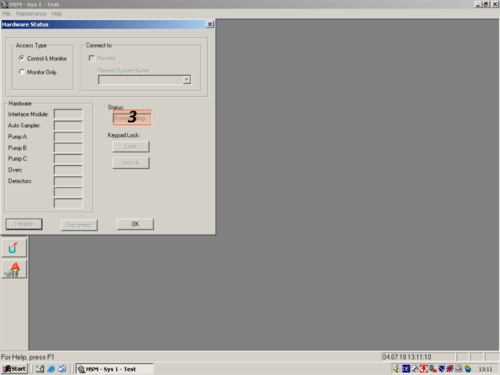 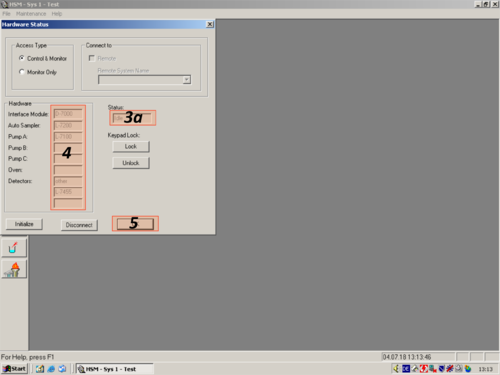 |
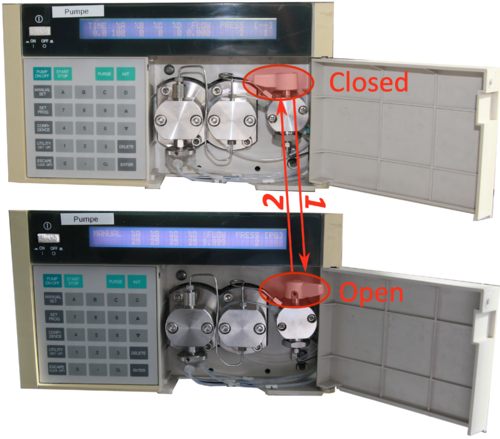
| After the HPLC is connected to the computer you have to purge the system. To purge it manually, is the easiest way to do it.
*Manually set the pump (Manual set |
 |
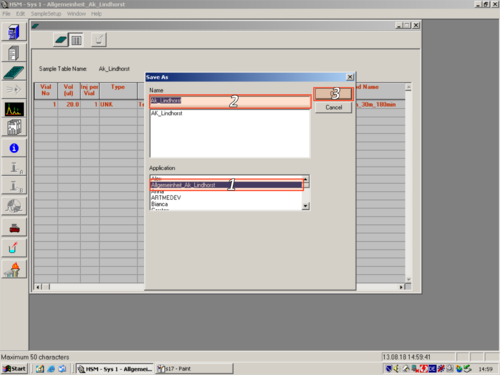
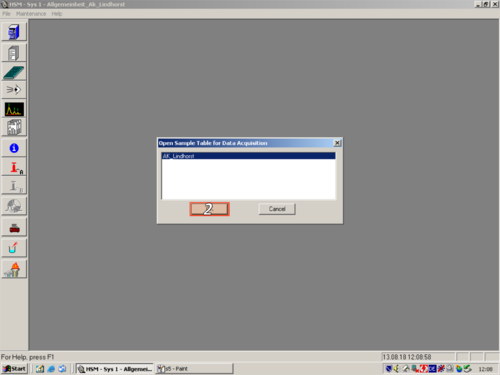
| When you are finished purging the system you have to choose the applications of a certain operator. In our case "Allgemeinheit Lindhorst" (1, 2, 3). | 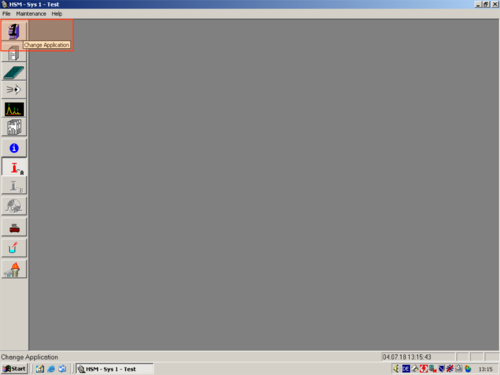 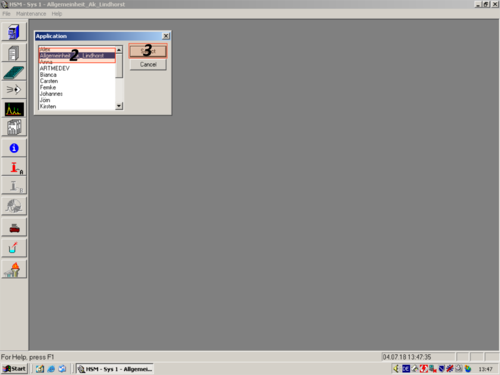 |
Method creating/editing
To be able to separate substances with the HPLC it is nesassary to setup a method. The easiest way to creat a method is by editing an existing method.
| Explanation | Picture |
|---|---|
| Click on "Method Setup" and choose a method you want to edit (1,2,3,4) | 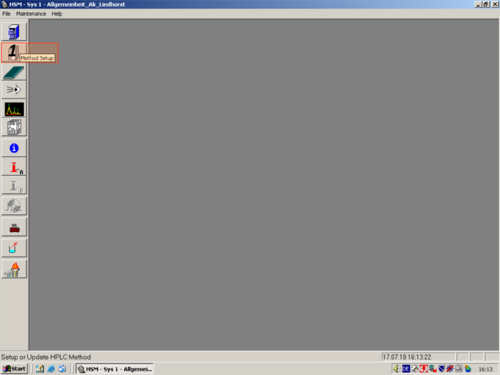 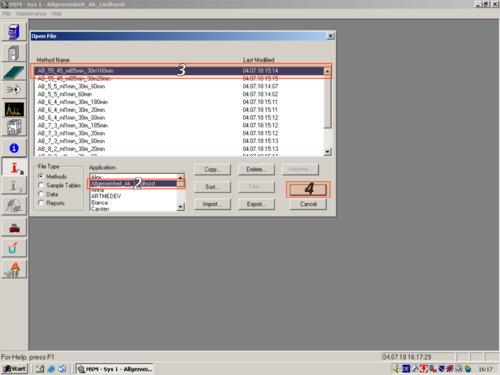 |
| When the window opens, the Method Information Icon is selected |
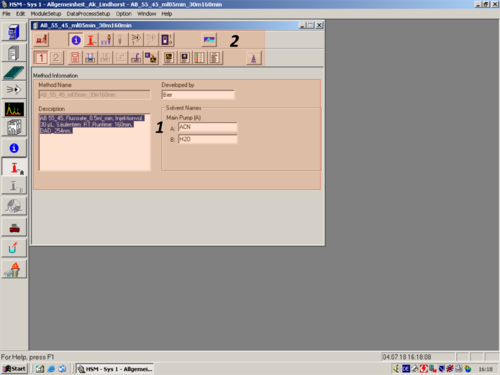 |
| If you don´t want to go to much into Details editing the method. Here are the most relevant parameters marked, that should be adapted.
* |
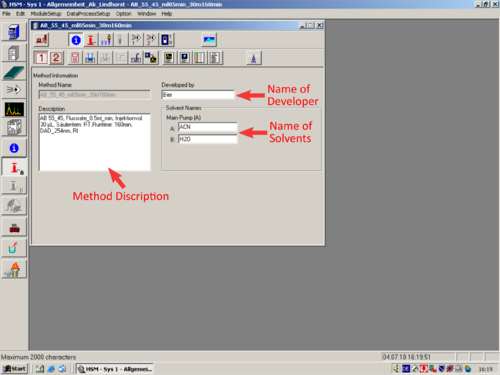 |
|
* |
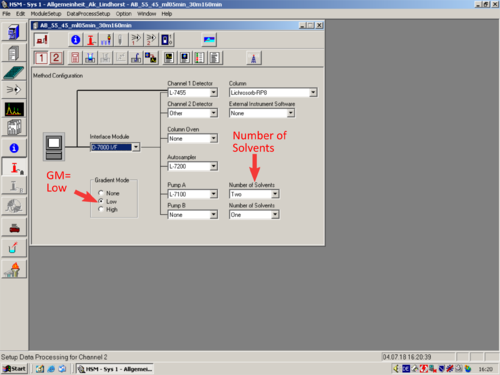 |
|
* |
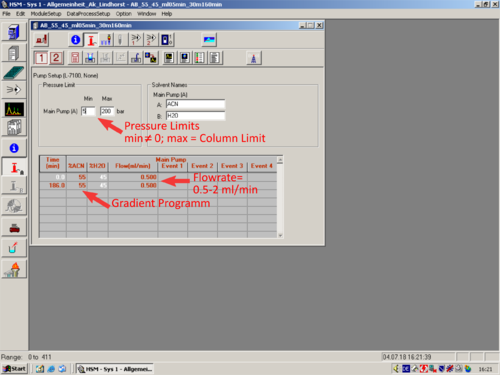 |
|
* |
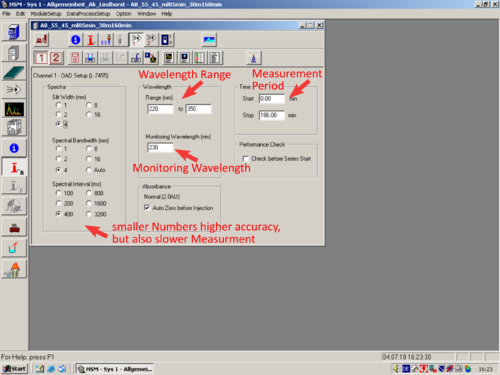 |
|
* |
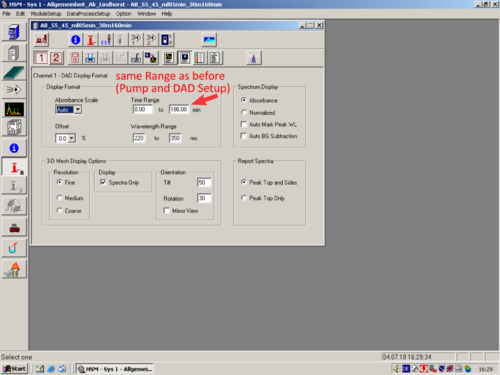 |
| After you have changed all parameters to your own desires, you have to save the method. Click File (1) and Save Method As (2). In the opening Window you have to give the method a name (3), assign a Aplikation to it (4) and press OK (5). | 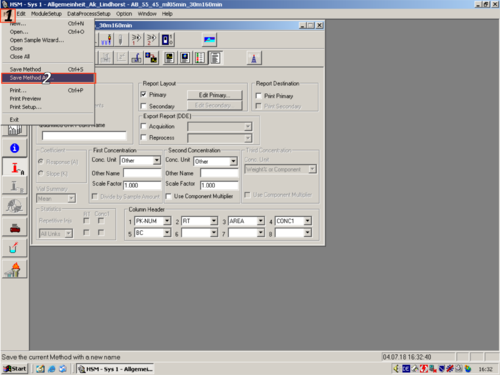 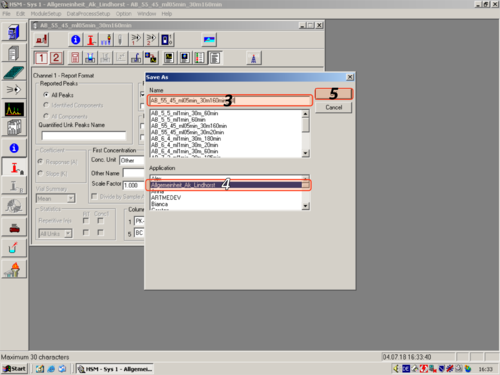 |
Measuring
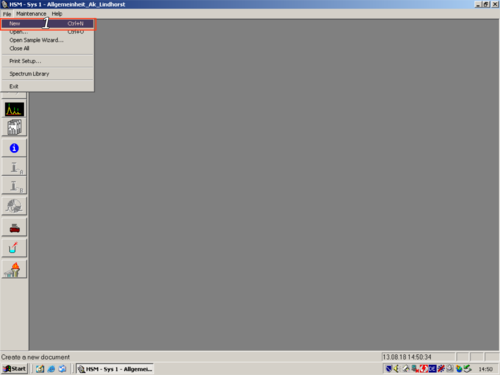
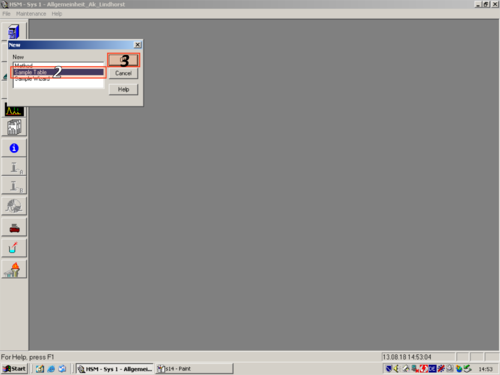
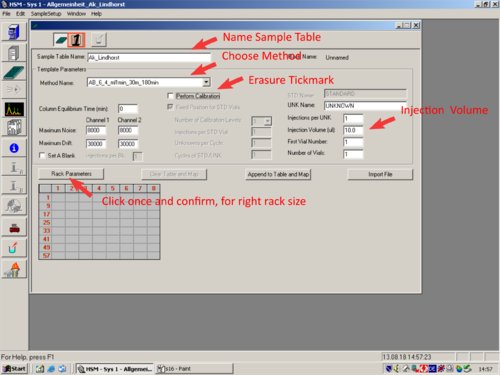
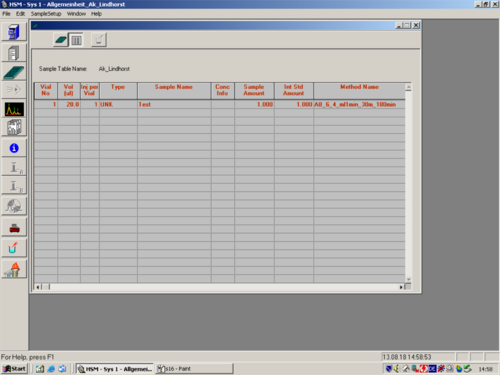
After purging the system and creating a method, the column you want to use should be chosen and flushed for about ~30 min with the desired solvent mixture. Columns don´t like harsh polarity changes, therefore a slow change of the solvent polarity to the desired solvent mixture is preferred. After conditioning the column, the prepared sample has to be put into the sample table of the autosampler. Then the position and the related method are listed in the sequence table.
Creating a sequence table
Start Measurment
Flushing
After the last measurement the column has to be flushed and stored at a certain solvent mixture. The column is normally flushed with a solvent mixture, which has a higher organic content then the solvent used during the measurement.
Shut Down
| Explanation | Picture |
|---|---|
| Turn the pump off. | 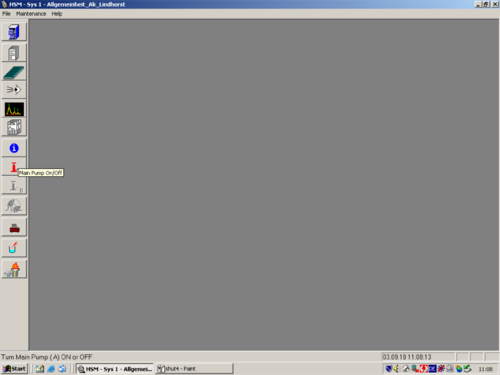 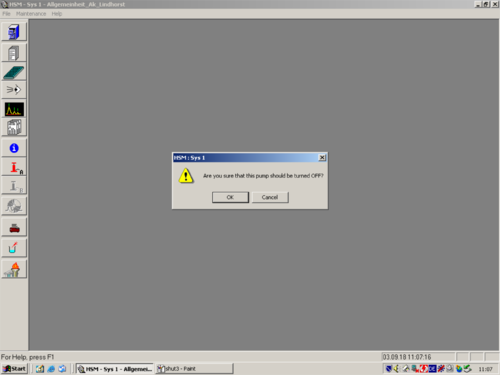 |
| Dissconect HPLC. | 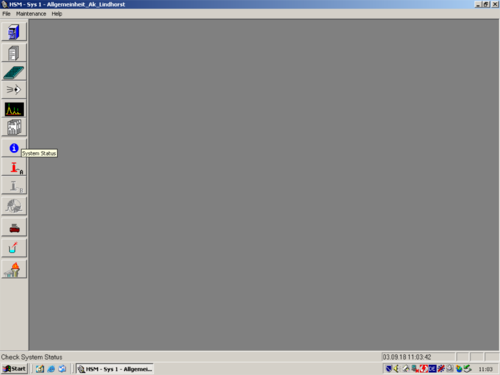 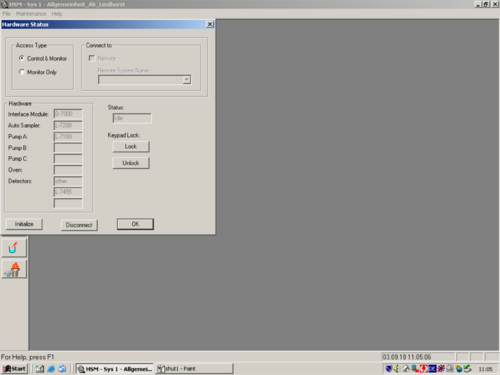 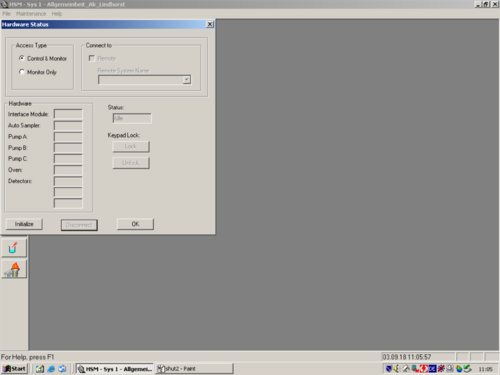 |
| Switch off the HPLC. |  |
Auswerten
Die Auswertung kann entweder an Hand des ausgedruckten Reports oder an Hand eines im offline Programm von Chemstation modifizierten Reports erfolgen. Von Interesse sind hierbei insbesondere die Retentionszeiten und Integrale der einzelnen Signale, auch das UV-Spektrum der einzelnen Signale gibt wichtige Hinweise.
Abschließende Hinweise
Vor Verwendung der HPLC ist es sinnvoll seine Zielsetzung klar zu definieren. Es bietet sich auch an für eine gute Dokumentation bei jeder Messungen ein Laufzettel zu verwenden, in dem alle Parameter der Messung vermerkt sind um eine Reproduzierbarkeit zu gewährleisten. Ein Vordruck kann hier oder im Desktopbereich des HPLC-Computers gefunden werden und bei Bedarf ausgedruckt werden.

